
Are you ready to recreate a classic Swiss breakfast staple in your own kitchen? The gipfeli recipe is perfect for anyone who loves light, flaky pastries with a touch of versatility. Although Gipfeli is often compared to croissants, it stands apart with its unique texture and flavor. This delightful pastry is slightly denser, less buttery, and wonderfully adaptable for both sweet and savory options.
In this comprehensive guide, you will not only learn how to master the gipfeli recipe but also discover its history, tips for success, and creative ways to make it your own. Whether you are new to baking or a seasoned pro, Gipfeli is a rewarding treat that will surely impress.
What Makes the Gipfeli Recipe Special?
Understanding Gipfeli: A Swiss Tradition
At first glance, Gipfeli may appear similar to croissants, but it possesses its own distinctive charm. Unlike the ultra-flaky croissant, the dough in a traditional Gipfeli recipe contains less butter, resulting in a pastry that is more structured and less delicate. This difference gives Gipfeli a unique texture, striking a perfect balance between lightness and substance, making it satisfying yet not overly rich.
Additionally, Gipfeli’s neutral flavor profile enhances its versatility, allowing it to pair beautifully with a wide variety of fillings. Whether sweet options like chocolate, almond paste, or fruit preserves, or savory choices like ham and cheese, spinach and feta, or smoked salmon, Gipfeli adapts effortlessly to suit any occasion. Its understated elegance and adaptability make it a staple of Swiss breakfast culture and a favorite for pastry lovers everywhere.
A Brief History of the Gipfeli Recipe
The Gipfeli recipe traces its origins to Austria, where the kipferl, a crescent-shaped pastry, gained popularity in the 17th century. This early version of the pastry was a favorite treat, known for its rich and satisfying texture. As the kipferl made its way to Switzerland, local bakers began adapting the recipe to align with Swiss preferences.
By reducing the butter content and refining the dough, they crafted a lighter, less rich version of the pastry, resulting in the beloved Gipfeli we know today. This adaptation quickly became a staple of Swiss breakfast culture, celebrated for its delicate texture and versatility. Over time, the Gipfeli has transcended borders, earning its place as a cherished pastry enjoyed across Switzerland and beyond. Whether paired with coffee or filled with sweet or savory delights, the Gipfeli continues to bring a taste of tradition to modern mornings.
How Gipfeli Differs from Croissants
While croissants and Gipfeli share a crescent shape, their differences are distinct:
- Butter Content: Croissants are made with a rich, buttery dough, while the gipfeli recipe uses less butter for a lighter texture.
- Flakiness: Gipfeli is less flaky than croissants, offering a more bread-like consistency.
- Flavor: The neutral dough in a Gipfeli allows for endless filling possibilities, from sweet to savory.
- Size: Typically, Gipfeli is smaller and more compact, making it perfect for individual servings.

Ingredients for the Gipfeli Recipe
Essential Ingredients
Creating an authentic gipfeli recipe requires simple but high-quality ingredients. Here’s what you’ll need:
- All-purpose flour: Provides the structure for the dough.
- Unsalted butter: Essential for creating layers.
- Milk: Adds richness and activates the yeast.
- Sugar: Balances the flavors and helps with browning.
- Salt: Enhances the overall taste.
- Active dry yeast: Gives the dough its light, airy texture.
- Egg: Used for the egg wash to achieve a golden crust.
Optional Fillings to Elevate Your Gipfeli
While Gipfeli is delightful on its own, adding fillings can elevate it to an entirely new level of indulgence. For those with a sweet tooth, consider filling the dough with rich chocolate, creamy almond paste, or tangy fruit preserves before rolling it into its signature crescent shape. These options add a touch of sweetness that complements the pastry’s flaky texture.
If you prefer a savory twist, Gipfeli can be just as versatile. Fill them with classic combinations like ham and cheese, spinach and feta, or even smoked salmon with a dollop of cream cheese for a gourmet flair. Whether sweet or savory, these fillings turn Gipfeli into a customizable treat perfect for breakfast, brunch, or any time you’re craving something special.
Tools You’ll Need to Make Gipfeli
Essential Baking Tools
To successfully prepare the gipfeli recipe, make sure to have these tools on hand:
- Rolling pin: Necessary for laminating the dough.
- Pastry brush: Helps apply the egg wash evenly.
- Baking sheet: Ensures even baking.
- Parchment paper: Prevents sticking and simplifies cleanup.
Alternative Tools You Can Use
Don’t have all the recommended tools? No problem! You can easily improvise with items you already have at home. For instance, a clean wine bottle works perfectly as a rolling pin for rolling out the dough. If you don’t have parchment paper, greased aluminum foil makes a great substitute to prevent sticking during baking. These simple swaps ensure you can still create delicious Gipfeli without needing specialized equipment. Baking is all about creativity and resourcefulness, so don’t let the lack of tools stop you from enjoying this delightful pastry!
How to Make the Perfect Gipfeli Recipe
Step 1: Preparing the Dough
First, activate the yeast by dissolving it in warm milk with a pinch of sugar. Let the mixture sit for about 10 minutes, or until it becomes frothy. Then, in a large bowl, mix the flour, sugar, and salt. Gradually add the yeast mixture and knead the dough until it is smooth and elastic.
Next, cover the dough with a damp cloth and allow it to rise in a warm spot for 1-2 hours, or until it doubles in size. This step ensures the dough develops the lightness characteristic of Gipfeli.
Step 2: Laminating the Dough
After the dough has risen, it’s time to prepare the butter block, a key step in creating the flaky layers of Gipfeli. Begin by flattening cold butter into a square, making sure it’s pliable but still firm. Roll out the risen dough into a large rectangle, ensuring it is big enough to fully encase the butter. Place the butter square in the center of the dough.
Fold the edges of the dough over the butter to enclose it completely, like wrapping a package. Gently roll out the dough into a rectangle again, being careful not to tear it and keeping the butter evenly distributed inside. To start creating the layers, fold the dough into thirds, like folding a letter. Wrap it in plastic or cover it, then chill it in the refrigerator for 20-30 minutes to allow the butter to firm up again.
Repeat this rolling, folding, and chilling process 3-4 times. This step, known as lamination, is crucial for forming the distinct, flaky layers. Always ensure the butter remains cold throughout the process to prevent it from melting into the dough. Proper lamination is key to achieving beautifully layered and airy Gipfeli.
Step 3: Shaping the Gipfeli
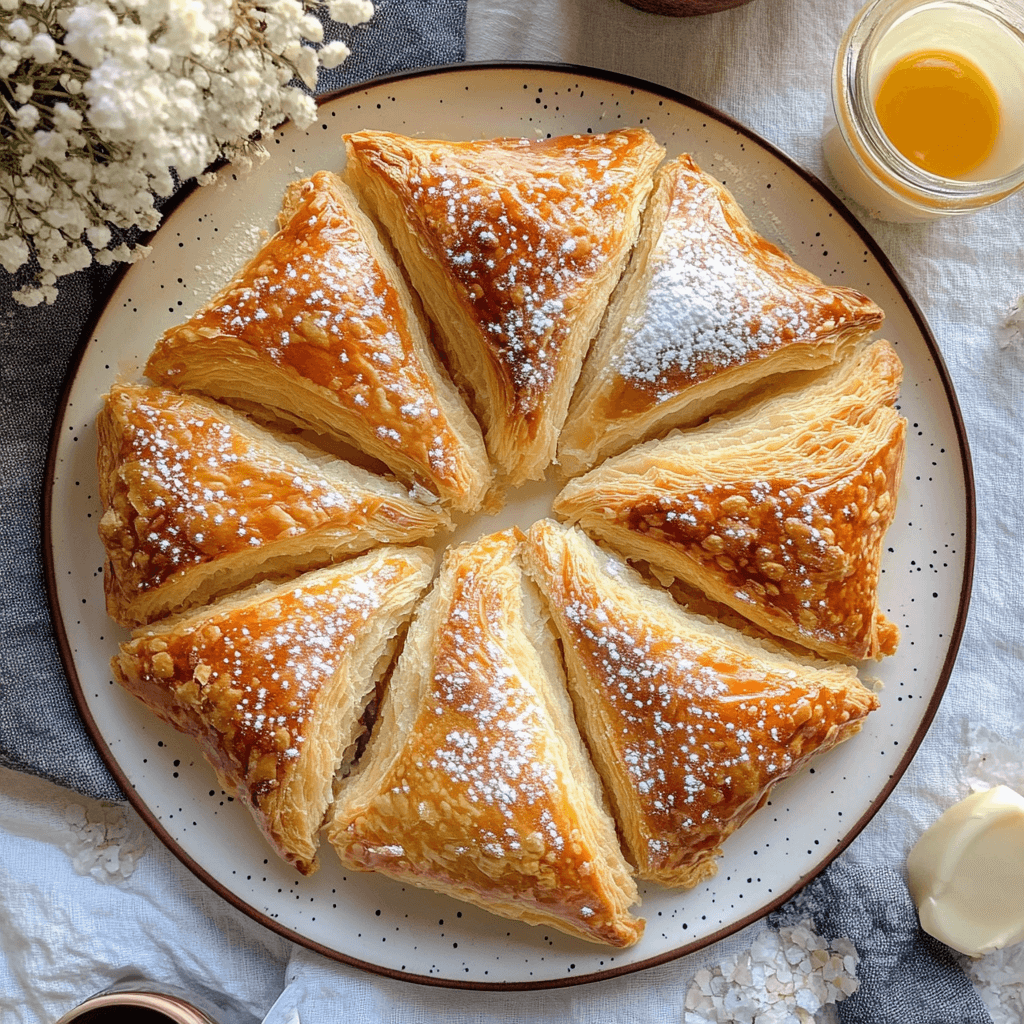
Once the dough is fully laminated, roll it out into a thin, even sheet on a lightly floured surface. Using a sharp knife or a pastry cutter, cut the dough into triangles, ensuring they are uniform in size for even baking.
To shape the Gipfeli, take each triangle and begin rolling it tightly from the base toward the pointed tip. This creates the classic crescent shape. As you finish rolling, make sure to tuck the tip securely underneath the rolled dough. This step is crucial to help the Gipfeli maintain their shape during baking and prevent them from unraveling. Repeat the process with all the triangles, and your Gipfeli will be ready for proofing and baking!
Step 4: Proofing and Baking
Place the shaped Gipfeli on a parchment-lined baking sheet, ensuring enough space between each piece to allow for expansion. Cover them lightly with a clean kitchen towel and let them proof for 30-40 minutes, during which time they will puff up slightly, indicating they are ready for baking.
While the Gipfeli are proofing, preheat your oven to 375°F (190°C) to ensure it’s fully heated when it’s time to bake. Once proofed, gently brush each Gipfeli with an egg wash made from a beaten egg to give them a beautiful golden, glossy finish.
Bake the Gipfeli in the preheated oven for 12-15 minutes, or until they are evenly golden brown and irresistibly fragrant. Allow them to cool slightly before serving, as the flaky layers will be at their best when warm but not too hot. Enjoy your perfectly baked Gipfeli fresh out of the oven!
Serving and Storing Your Gipfeli
Serving Suggestions
Now that your Gipfeli recipe is complete, it’s time to savor the fruits of your labor. These delightful pastries are perfect for any time of day, whether as part of a leisurely breakfast or a cozy afternoon snack. Serve your freshly baked Gipfeli with a steaming cup of coffee, aromatic tea, or a rich, velvety Swiss hot chocolate for the ultimate indulgence.
For those with a sweet tooth, consider pairing them with fruit preserves, a drizzle of honey, or a dollop of whipped cream to elevate their flavor. If you prefer savory accompaniments, try serving them with butter, a selection of cheeses, or even thinly sliced smoked salmon for a sophisticated twist. Whatever you choose, Gipfeli are a versatile and irresistible treat that can be enjoyed in countless ways. Bon appétit!
Storing and Reheating Tips
For short-term storage, keep Gipfeli in an airtight container at room temperature for up to three days. This method helps preserve their freshness and prevents them from drying out or becoming stale. If you plan to enjoy them later or in larger batches, freezing is an excellent option. To freeze, shape the Gipfeli as usual and place them on a tray, ensuring they don’t touch to prevent sticking. Once frozen solid, transfer them to a freezer-safe bag or container for convenient storage.
When you’re ready to bake, there’s no need to thaw the frozen Gipfeli. Simply place them directly in the oven, adjusting the baking time by adding a few extra minutes to ensure they bake evenly and turn golden brown. This method allows you to enjoy freshly baked Gipfeli on demand, making it a perfect solution for busy mornings or unexpected guests. Proper storage techniques ensure that the Gipfeli maintain their delicious texture and flavor, whether stored for a few days or kept frozen for longer.
Tips for Perfecting the Gipfeli Recipe
- Cold Butter is Key: Ensure the butter stays cold throughout the lamination process to preserve distinct layers and achieve the desired flakiness.Don’t Overproof: Avoid overproofing the dough, as it can lead to the Gipfeli collapsing during baking and losing its shape.Experiment with Flavors: Add a personal touch by incorporating zest, spices, or seeds into the dough, allowing you to create unique variations of this classic pastry.By following these tips, you can perfect your Gipfeli and even give it a creative twist!

Frequently Asked Questions
What’s the difference between Gipfeli and croissants?
Gipfeli has a less buttery flavor and a denser texture compared to croissants, which are known for their ultra-flaky layers and rich, buttery taste. While both pastries share a similar crescent shape, their distinct characteristics set them apart, with Gipfeli offering a heartier bite and croissants delivering a luxurious, melt-in-your-mouth experience.
Can I use whole wheat flour for Gipfeli?
Yes, you can substitute with this ingredient, but limit it to 25% of the total flour to maintain a light and airy texture. This ensures that the structure of the dough remains intact while still incorporating the desired flavor or nutritional benefits.
How long does it take to make Gipfeli?
The entire process, from proofing to baking, typically takes about 4-5 hours. This time allows the dough to rise properly, develop its flavor, and achieve the perfect texture before it’s ready to be baked to golden perfection. While it requires some patience, the end result is well worth the effort.
Conclusion
The gipfeli recipe is a wonderful way to bring the flavors of Switzerland into your home. Whether served plain or filled, these crescent-shaped pastries are perfect for any occasion. With this guide, you’ll not only master the art of Gipfeli but also enjoy a satisfying baking experience. Give it a try today!
Related article:
Why is My Apple Cake Raw in the Middle?