


If you’re looking for the ultimate ground beef chili recipe, you’ve come to the right place! This hearty, flavorful dish is perfect for cozy nights, family dinners, or meal prepping for the week. I’ve spent years perfecting my chili, experimenting with spices, and finding the best balance of flavors. Now, I’m excited to share my step-by-step guide, pro tips, and ingredient swaps to help you make the best homemade chili with ground beef.
Why I Love Ground Beef Recipes
There’s something incredibly satisfying about preparing dishes that revolve around ground beef. Ground beef recipes are incredibly versatile, budget-friendly, and packed with flavor. I remember the first time I tasted my mom’s version of a beef chili—its rich aroma and bold flavors made a lasting impression. Over the years, I’ve experimented with different spices, techniques, and even ingredient swaps, and today, I’m sharing a recipe that has evolved with love, experimentation, and a few happy accidents.
Not only does this hearty chili work perfectly for busy weeknights, but it also serves as a brilliant base for other variations. Whether you’re a novice cook or a seasoned chef, this recipe’s flexible nature makes it ideal for anyone. And if you’re interested in exploring more creative ideas, you can check out additional recipes on Activity Recipes for more inspiration.
A Personal Journey with Hearty Ground Beef Chili
I first discovered the magic of ground beef chili during a particularly cold winter when I craved something robust and filling. My family gathered around the kitchen table, and as the aroma filled the house, we all knew we were in for a treat. That evening not only created cherished memories but also inspired me to experiment further with ground beef recipes. I began to play with spices, introduce unexpected ingredient substitutions, and eventually perfected my own version of this classic dish.
Every time I prepare this chili, I’m reminded of those cozy moments. Cooking is about more than just food—it’s about the stories we create and the bonds we nurture. Over the years, I’ve learned that great recipes come from a mix of tradition and innovation, and that’s exactly what my version of ground beef chili represents.
Ingredients & Substitutions
Before we dive into the step-by-step instructions, let’s talk about the ingredients. One of the best things about ground beef recipes is the ability to customize them based on what you have on hand. Here’s a detailed list of ingredients for my hearty ground beef chili, along with some alternative options you might consider.
Main Ingredients
- 1 lb ground beef
(For a leaner version, use 90% lean ground beef, or substitute with ground turkey for a lighter twist.) - 1 large onion, finely chopped
- 3 cloves garlic, minced
- 1 green bell pepper, diced
- 1 red bell pepper, diced
- 1 jalapeño pepper, seeded and finely chopped
(Optional: Leave seeds in for extra heat.) - 1 (14.5 oz) can diced tomatoes
(Fresh tomatoes can be used when in season.) - 1 (15 oz) can tomato sauce
- 1 (15 oz) can kidney beans, drained and rinsed
- 1 (15 oz) can black beans, drained and rinsed
- 1 cup beef broth
(Vegetable broth works as a substitute for a milder flavor.) - 2 tbsp tomato paste
Spices & Seasonings
- 2 tsp chili powder
- 1 tsp ground cumin
- 1/2 tsp smoked paprika
- 1/2 tsp dried oregano
- 1/4 tsp cayenne pepper
(Adjust based on your heat preference.) - Salt and black pepper to taste
Optional Garnishes
- Shredded cheddar cheese
- Sour cream or Greek yogurt
- Fresh cilantro, chopped
- Sliced green onions
These ingredients come together to create a rich, flavorful chili that balances the savory depth of the beef with the tanginess of tomatoes and the warmth of spices. Remember, one of my top cooking tips is to taste as you go—don’t be afraid to adjust the seasoning based on your personal preference.
Step-by-Step Instructions
Now that you have everything ready, let’s dive into the cooking process. I’ve broken down the recipe into clear, manageable steps to make your cooking experience enjoyable and stress-free.
H2: Preparing the Ingredients
Step 1: Gather and Prepare Your Ingredients
Before you start cooking, ensure all your ingredients are measured, chopped, and ready to go. I always find that prepping in advance makes the process smoother and more enjoyable. Having everything at your fingertips lets you focus on the art of cooking rather than scrambling around for missing components.
- Pro Tip: Use a sharp knife to chop vegetables evenly. This not only speeds up the process but also ensures that all pieces cook at the same rate.
Step 2: Warm Up Your Cooking Surface
In a large, heavy-bottomed pot or Dutch oven, heat 1-2 tablespoons of olive oil over medium heat. This pot will be your canvas for creating the perfect chili.
H2: Cooking the Ground Beef
Step 3: Sauté the Vegetables
Add the chopped onions, garlic, green and red bell peppers, and jalapeño pepper to the pot. Sauté these for about 5-7 minutes, stirring occasionally until they soften and begin to caramelize. This step releases their natural sugars and intensifies their flavor.
- Image Tip: If you’re capturing your cooking journey, snap a picture of your vibrant, sautéed vegetables. Use alt text like “sautéed onions, bell peppers, and garlic in a hearty ground beef chili” to boost your SEO.
Step 4: Brown the Ground Beef
Increase the heat slightly and add the ground beef to the pot. Use a wooden spoon to break up the meat into small, even pieces. Cook until the beef is fully browned and no pink remains, which should take about 8-10 minutes.
- Cooking Tip: Draining excess fat at this point can help prevent a greasy finish, but a little fat is great for flavor. If you prefer, leave some fat in for extra richness.
Step 5: Combine and Season
Once your beef is browned, stir in the tomato paste and let it cook for another 1-2 minutes. This helps the paste deepen in flavor. Next, sprinkle in the chili powder, cumin, smoked paprika, dried oregano, cayenne pepper, and a generous pinch of salt and pepper. Stir well to ensure the spices coat the meat evenly.
H2: Simmering the Chili
Step 6: Add the Tomatoes and Beans
Now, add the diced tomatoes (with their juices) and tomato sauce to the pot. Follow with the kidney and black beans. Pour in the beef broth and mix everything thoroughly.
- Substitution Note: If you prefer a chunkier texture, you can opt for fire-roasted tomatoes, which add a smoky flavor to the chili.
Step 7: Bring to a Boil and Then Simmer
Increase the heat to bring the mixture to a boil. Once boiling, reduce the heat to low and let the chili simmer uncovered for about 30-45 minutes. This slow simmering allows all the flavors to meld beautifully.
- Pro Tip: Stir occasionally to prevent sticking, especially if your pot is on the thinner side.
Step 8: Final Adjustments and Tasting
After simmering, taste your chili. This is the perfect time to adjust the seasoning. Maybe it needs a bit more salt, a splash of lime juice, or a sprinkle of extra chili powder for an extra kick. I always recommend tasting before serving—it makes a world of difference in the final dish.
Serving Suggestions & Pairings
There’s nothing like serving a warm bowl of hearty ground beef chili on a cold day. Here are some ideas to elevate your meal:
H3: Delicious Pairings
- Cornbread: A slice of moist, buttery cornbread pairs wonderfully with chili. Its slight sweetness contrasts perfectly with the savory heat of the chili.
- Rice or Quinoa: Serve your chili over a bed of fluffy rice or protein-packed quinoa for a complete meal.
- Tortilla Chips: Crunchy tortilla chips add a delightful texture contrast and are great for scooping up every bit of the rich sauce.
- Fresh Salad: A simple mixed green salad with a tangy vinaigrette can balance the bold flavors of the chili.
H3: Garnish Ideas
- Shredded Cheddar Cheese: Sprinkle a generous amount on top for a melty, rich finish.
- Sour Cream or Greek Yogurt: A dollop of creaminess adds a cooling effect against the spices.
- Fresh Cilantro and Green Onions: These add a burst of freshness and a pop of color to your dish.
- Avocado Slices: Creamy avocado provides a luxurious texture contrast and additional nutritional benefits.
For more creative pairings and additional recipes, check out Activity Recipes. I’ve found that a well-rounded meal can turn any dinner into a memorable experience.
Storage & Reheating Tips
One of the best aspects of this chili is how well it stores and even tastes better the next day! Here are some tips on preserving your culinary masterpiece:
H3: Storing Your Chili
- Refrigeration: Allow the chili to cool completely before transferring it to an airtight container. It will keep in the refrigerator for up to 4 days.
- Freezing: For longer storage, portion the chili into freezer-safe containers or resealable bags. It can be frozen for up to 3 months. To reheat, thaw overnight in the refrigerator and warm on the stove over low heat, stirring occasionally.
H3: Reheating Tips
- Stovetop Method: Reheat the chili in a pot over medium-low heat. Add a splash of water or broth if it has thickened too much.
- Microwave Method: Place a portion in a microwave-safe bowl, cover loosely, and heat on medium power in 1-minute intervals until warmed through. Stir between intervals for even heating.
- Extra Flavor: Sometimes, reheating can dull flavors slightly. A fresh squeeze of lime or a sprinkle of fresh herbs can revive the taste brilliantly.


Common Mistakes & Troubleshooting
Even seasoned cooks can encounter a few bumps along the way when making ground beef recipes. Here are some common pitfalls and my personal tips to avoid them:
H3: Overcooking the Beef
- Mistake: Cooking the ground beef for too long after browning can make it tough and dry.
- Solution: Once the meat is browned, promptly add the vegetables and liquids to allow the flavors to meld without overcooking the beef.
H3: Not Balancing the Spices
- Mistake: Sometimes, the spice mix can overpower the dish or not be pronounced enough.
- Solution: Taste the chili at multiple stages during cooking. Start with the recommended amounts, then adjust as needed with extra salt, chili powder, or even a hint of sugar if you need to balance acidity.
H3: Chili Too Watery or Too Thick
- Mistake: Depending on the liquid you use, your chili might end up either too thin or overly thick.
- Solution: If it’s too watery, let it simmer uncovered for a bit longer to evaporate excess liquid. If it’s too thick, add a bit more broth or water until you achieve your desired consistency.
H3: Skipping the Simmer
- Mistake: Rushing the simmering process can lead to a chili that lacks depth and flavor.
- Solution: Patience is key. Allowing the chili to simmer slowly helps the flavors meld together beautifully. I always recommend at least 30 minutes of simmer time, though 45 minutes is even better.
Frequently Asked Questions (FAQs)
I often get a lot of questions about my ground beef chili recipe, so I’ve compiled a list of FAQs that might help you too:
Q1: Can I make this chili ahead of time?
Absolutely! In fact, chili is one of those dishes that tastes even better the next day as the flavors have more time to meld. Store it in an airtight container in the refrigerator for up to 4 days or freeze for longer storage.
Q2: Can I substitute ground beef with another protein?
Yes, you can substitute ground beef with ground turkey or chicken for a leaner version. Vegetarian alternatives such as textured vegetable protein (TVP) or even lentils can also work wonderfully if you’re looking to skip the meat.
Q3: How can I adjust the spice level?
If you prefer a milder chili, reduce the amount of cayenne pepper and jalapeño. Conversely, if you like it spicier, consider adding extra chili powder or even a dash of hot sauce during the simmering stage.
Q4: What should I serve with this chili?
This chili pairs beautifully with cornbread, rice, tortilla chips, or even a fresh salad. I personally love serving mine with a side of garlic bread on a cold evening for that extra comforting touch.
Q5: How do I know when the chili is done?
The chili is ready when the flavors have melded, the vegetables are tender, and the consistency is just right for your taste. If you have time, let it simmer for up to 45 minutes and taste periodically. The depth of flavor increases with simmering time.
Final Thoughts & Call to Action
Cooking has always been a way for me to express creativity and share love with the people around me. This hearty ground beef chili is more than just a recipe—it’s a journey that brings warmth, flavor, and memories to every table. I hope you feel inspired to try this recipe in your own kitchen and perhaps even tweak it to suit your personal taste. Every time I make this dish, I discover a new nuance in flavor or a clever ingredient swap that makes it uniquely mine.
If you enjoyed this recipe and found my tips helpful, please share your thoughts in the comments below. I’d love to hear how your version turned out, any substitutions you made, or other ground beef recipes you adore. Also, don’t forget to share this article on your social media to spread the love of cooking. For more delicious ideas and creative twists on classic dishes, visit Activity Recipes and explore a treasure trove of culinary inspiration.
Extra Tips for Perfecting Your Ground Beef Chili
As with any recipe, practice makes perfect. Here are some additional insights I’ve gathered over time to ensure your chili turns out fantastic every time:
- Quality of Meat: Always try to use fresh, high-quality ground beef. Look for meat with a balanced fat content (around 15-20%) to ensure richness without being overly greasy.
- Slow Cooking: If you have a slow cooker, consider transferring the chili after browning the meat and sautéing the vegetables. Let it cook on low for 6-8 hours for an even more intense flavor.
- Layering Flavors: Adding ingredients in stages—first the aromatics, then the meat, and finally the liquids—helps build a more complex flavor profile.
- Herb Finishing Touch: A final sprinkle of fresh cilantro or parsley right before serving can add a burst of color and freshness that elevates the dish.
- Experiment Boldly: Don’t hesitate to experiment with additional spices such as smoked chipotle or even a dash of cocoa powder for a subtle depth. Remember, your kitchen is your laboratory!
A Visual Journey
While I can’t share every moment in pictures here, I always find that documenting your cooking process can be incredibly rewarding. Consider snapping photos of:
- The Sautéed Vegetables: Capture the colorful mix of onions, peppers, and garlic as they caramelize.
- Browning the Beef: A close-up shot of the sizzling beef in the pot shows that perfect sear.
- The Simmering Pot: The bubbling, rich chili as it simmers slowly to perfection.
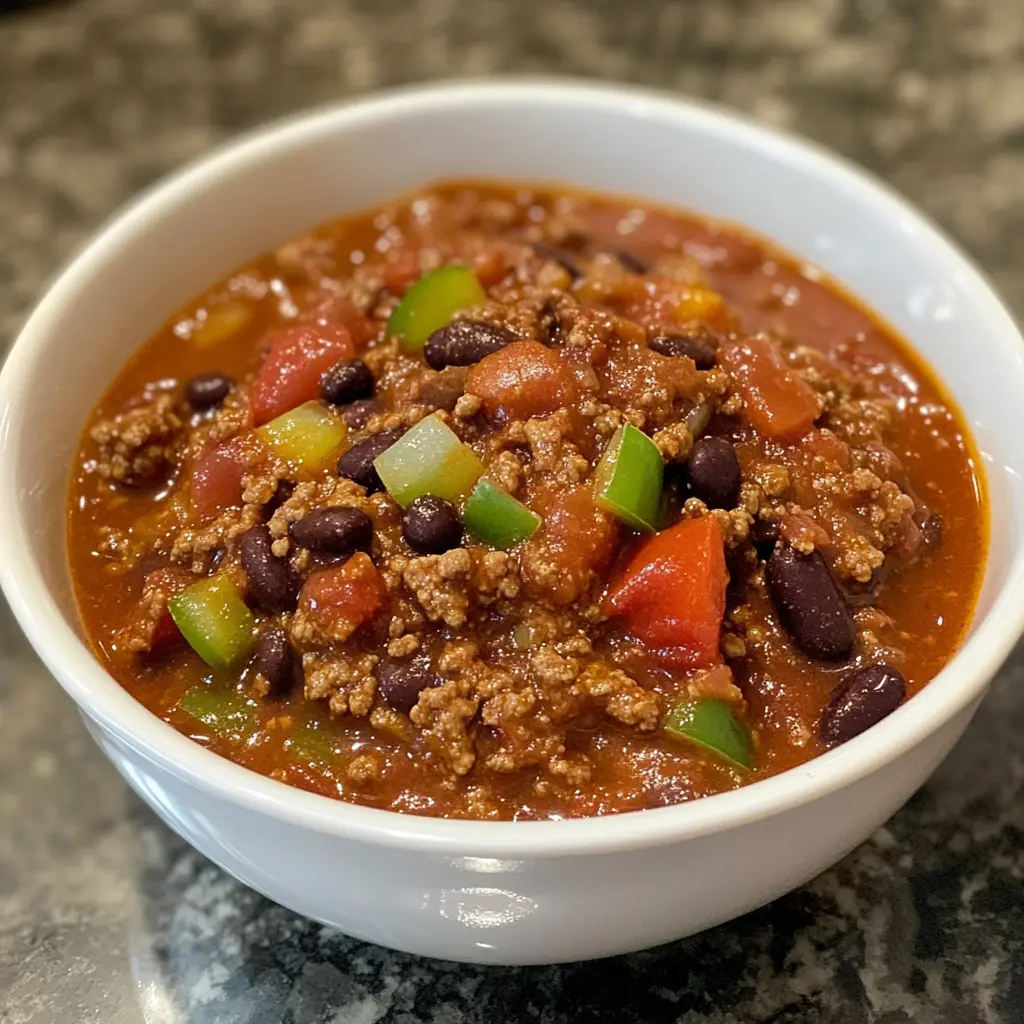
- The Finished Dish: A bowl of piping hot chili garnished with cheese, cilantro, and a dollop of sour cream.
When you post these images online, remember to include descriptive alt text such as “Hearty ground beef chili simmering in a Dutch oven” to boost your SEO and help visually impaired users understand your content.
Wrapping It All Up
I hope this detailed guide on one of my favorite ground beef recipes inspires you to try something new in your kitchen. From my personal anecdotes to every little tip and substitution, I’ve aimed to provide you with a comprehensive resource that makes cooking both fun and rewarding. Whether you’re preparing a meal for yourself, your family, or a special gathering, this ground beef chili is sure to please with its robust flavors and comforting warmth.
Remember: Great cooking is all about personalization. Feel free to adjust the spice levels, experiment with different beans, or even incorporate seasonal vegetables to make the dish your own.
If you decide to recreate this recipe, I’d be thrilled to see your results. Leave a comment below, share your photos, and let me know if you made any exciting tweaks. Your feedback not only inspires me but also helps fellow readers discover new ideas for their next culinary adventure.
For even more amazing recipes and creative food ideas, be sure to visit Activity Recipes—a treasure trove of culinary inspiration for every occasion. And if you found this guide helpful, please share it with friends and family who love exploring delicious ground beef recipes.
Final Call to Action
I’m so grateful you took the time to read through my ultimate ground beef chili guide. Now it’s your turn—roll up your sleeves, gather your ingredients, and let the cooking adventure begin! Don’t forget to share your experience and any modifications you made. Your stories and feedback are what keep our cooking community vibrant and connected.
Happy cooking, and may your chili always be hearty and delicious!
External Resources:
- For more tips on ground beef safety and quality, check out the USDA guidelines on meat handling at USDA Food Safety and Inspection Service.
- Explore additional spice and seasoning ideas on Serious Eats to expand your flavor repertoire.
This guide is my personal invitation to join the world of flavorful ground beef recipes. I hope you feel empowered to experiment and enjoy every moment spent in the kitchen. Thanks for reading, and I look forward to hearing about your delicious creations soon!