


1. Understanding the Discada Concept
When it comes to preparing the perfect discada, one key question arises: what goes first in a discada? The answer can make or break your dish! Starting with the right ingredient, such as bacon or another fatty cut, creates a flavorful base for everything else to shine. This essential first step sets the stage for the rich, smoky flavors that define discada.
Discada, a popular Northern Mexican dish, is all about layering meats, vegetables, and seasonings in a precise order. Each addition builds on the previous layer, resulting in a fusion of textures and flavors that’s as much fun to cook as it is to eat.
Historical Roots
The origins of discada trace back to rural and ranching communities in Northern Mexico. It’s said that agricultural workers found a brilliant new use for old plow discs. After removing or sealing the axle hole in the center, they transformed these discs into robust, portable cooking pans. Because these communities tended to raise livestock like cattle and pigs, they often had fresh meat on hand. This combination of readily available meats and a creative cooking vessel gave birth to what we now call discada.
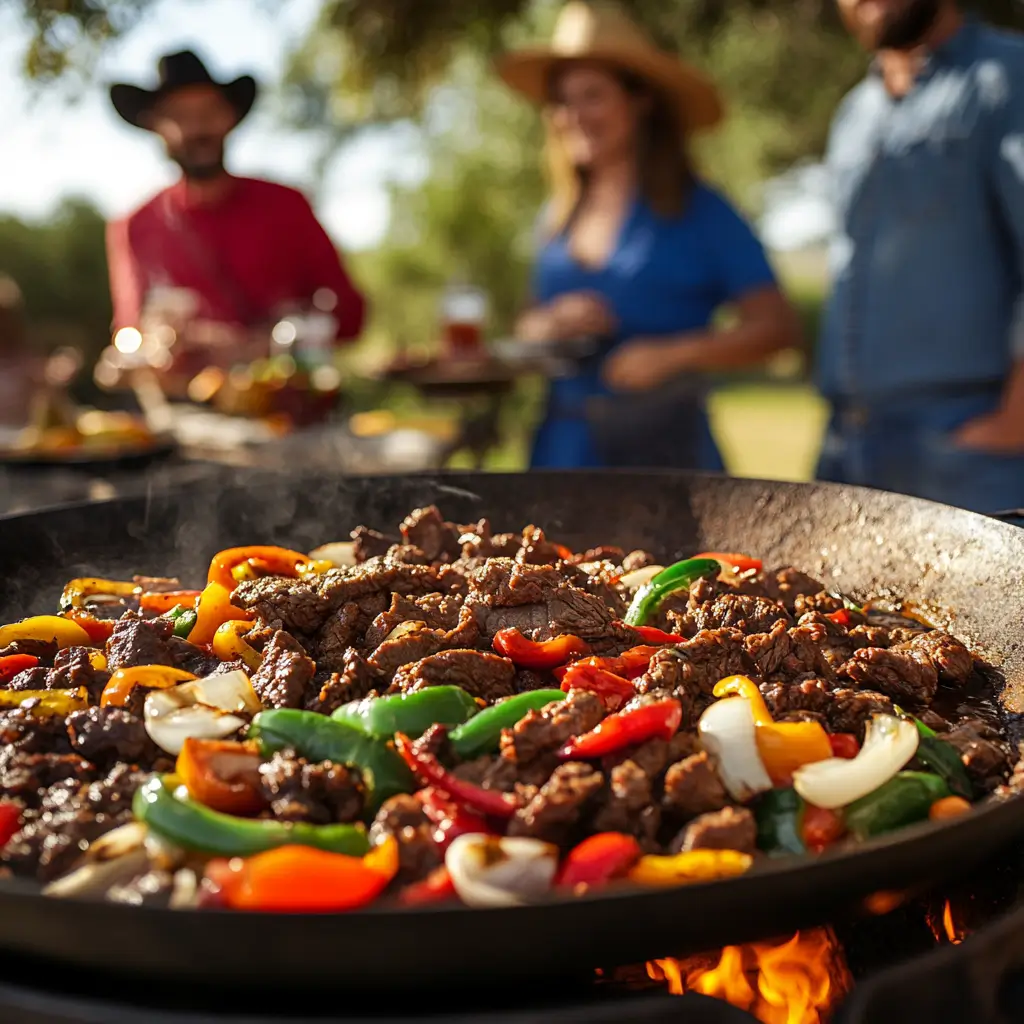
Outdoor Cooking Tradition
Although you can make a version of discada on a stove using a large wok or skillet, the authentic approach is entirely outdoors, typically atop a propane burner, charcoal, or wood fire. Open-air cooking allows for a slightly smoky flavor to infuse the ingredients, adding that extra dimension. Additionally, being outdoors makes clean-up easier and fosters a festival-like vibe. Kids run around playing games, while adults sip refreshments and anticipate the final unveiling of the steaming hot discada.
2. Essential Equipment and Preparation
Your discada journey begins with the right tools and planning. While the dish might look like a simple toss-everything-in approach, having the right equipment and properly prepped ingredients can spell the difference between a mediocre meal and a showstopper.
The Ideal Disc
Authentic discada relies on a repurposed plow disc. Modern commercial versions often come pre-seasoned, complete with welded handles and sometimes even a lid. When searching for a disc:
- Thickness Matters: A thick disc distributes heat more uniformly and is less prone to warping.
- Comfortable Handles: You may need to maneuver the disc during cooking, especially if the heat becomes uneven.
- Seasoning: Similar to a cast-iron skillet, discs benefit from being seasoned. Rub oil on the surface, then heat it until a protective layer forms.
A key perk of using an authentic plow disc is that it adds rustic charm. However, if you’re just starting out, you can find specialized “discada discs” at hardware stores, restaurant supply shops, or online retailers.
Tools and Accessories
- Heat Source: You can use propane burners, charcoal, or wood. Propane burners provide more consistent heat control, while charcoal or wood can lend a smoky essence.
- Long-Handled Utensils: A sturdy spatula, spoon, or tongs are crucial for frequent stirring.
- Oil or Fat: Even though bacon or chorizo will render some fat, keep extra oil or lard nearby in case the disc dries out.
- Thermometer: Checking internal meat temperatures can be helpful, especially if you’re juggling multiple types of protein.
- Aluminum Foil or Lid: Useful for trapping heat once the cooking is nearly finished.
Proper Prep of Meats and Veggies
Pre-cut all your ingredients to save time and ensure everything goes into the disc at just the right moment:
- Meats: Dice or slice your bacon, chorizo, beef, pork, sausages, or chicken into evenly sized pieces. If you’re marinating, do so in a sealed container in the fridge for at least 30 minutes.
- Vegetables: Chopped onions, peppers (bell, serrano, or jalapeño), and tomatoes are standard. You might also add garlic or mushrooms for extra flair.
- Seasonings: Basic salt and pepper often suffice, but feel free to experiment with chili powders, cumin, oregano, and even a splash of beer or broth.
By prepping carefully, you can smoothly transition between each cooking stage and keep the outdoor cooking session fun, rather than frantic.
3. The All-Important First Step (What Goes First in a Discada?): Bacon, or the Fatty Base
Now we arrive at the burning question: what goes first in a discada? The unanimous answer among seasoned discada cooks is bacon—or another fatty ingredient—because it delivers both flavor and cooking fat in one step.
Why Bacon?
Bacon is inherently rich in fat that renders out when it hits the hot disc. This mouthwatering, smoky fat:
- Prevents Sticking: Other ingredients, like chorizo or leaner beef cuts, are much less likely to burn or stick.
- Adds Flavor: Bacon fat is simply unmatched in depth and aroma, instantly elevating the entire dish.
- Sets the Tone: The sizzling sound and tantalizing smell of bacon cooking in a disc gather people’s attention like magic.
By starting with bacon, you create a savory foundation for all the proteins and vegetables that follow. As the bacon crisps, it lends texture and an irresistible flavor that will echo through every bite of the finished discada.
Alternative Fat Sources
If you can’t or prefer not to use bacon, there are still ways to maintain an authentic discada experience:
- Chorizo First: Spiced chorizo sausage also releases a decent amount of fat, though you may need to add a tablespoon or two of oil initially to avoid sticking.
- Beef Bacon or Turkey Bacon: For those avoiding pork, these alternatives can do the trick, although the flavor profile will differ slightly.
- Vegetable Oil or Lard: In vegetarian or vegan versions, use canola or vegetable oil and incorporate plenty of smoked spices (like smoked paprika) to capture some of that bacon-esque essence.
Regardless of your choice, the key is to render fat first. This ensures subsequent ingredients can be cooked at high heat without scorching or losing moisture.
Building Layers of Flavor
Discada is all about layering. After you’ve crisped the bacon (or your chosen fat source), you can immediately add chorizo, letting its spices combine with the bacon’s smoky undertones. Next comes beef, pork, or other meats, searing in the rendered oil until they are partly cooked and deeply browned. By the time vegetables enter, the disc is already packed with layers of flavor—an orchestration that starts with that all-important first step.
4. Sequential Addition of Ingredients
Once your fatty base is established, the rest of the cooking process unfolds in stages. Think of it like a culinary symphony, where each ingredient contributes its distinct “note” at precisely the right moment.
Timing Your Meats
- Chorizo: Stir in chorizo after the bacon begins to release its fat. The spiced oils from chorizo will further boost flavor, coloring the entire mixture a vibrant reddish hue.
- Beef or Pork Cuts: Once the chorizo browns slightly, add diced beef (skirt steak, flank steak, ground beef) or pork. Let these cuts sear to seal in juices. Stir occasionally to avoid burning.
- Sausages or Hot Dogs (Optional): Tex-Mex variations often include hot dogs or sausage slices. These can be added shortly after the beef starts to cook, as they generally need less time to develop color.
Keep your heat at a level that promotes browning without scorching. Because discada is typically cooked outdoors, the flame can be somewhat unpredictable. Use your spatula or spoon to scrape up any browned bits at the bottom, incorporating them back into the mixture for extra depth.
Vegetables in the Mix
Once your meats are about 70–80% cooked, it’s time for vegetables:
- Onions: Onions soak up the rendered fats, adding sweetness as they caramelize. If you prefer them more caramelized, you can toss them in earlier.
- Garlic: Add minced garlic once onions become translucent. Garlic can burn quickly, so watch it closely.
- Peppers: Bell peppers and chiles (jalapeño or serrano) contribute both color and flavor. Adjust the quantity or variety to match your preferred spice level.
- Tomatoes: Often introduced last among vegetables, tomatoes release moisture that helps deglaze the disc, creating a light sauce.
Final Touches and Seasonings
At this stage, the discada should look and smell incredible. Feel free to taste-test and make final adjustments:
- Salt and Pepper: Don’t over-season early on. Wait until the end to add more salt if needed, because bacon and chorizo can be quite salty.
- Cumin or Chili Powder: For a more robust taste, sprinkle in these spices sparingly.
- Beer or Stock: A small splash can loosen any caramelized bits and add complexity.
- Herbs: Some cooks finish with fresh cilantro or scallions for a burst of brightness.
Let everything simmer together for a few minutes. The end goal is a cohesive blend of flavors where no single ingredient dominates. Once satisfied, reduce the heat to keep the discada warm while you finalize your serving setup.
5. Texture and Flavor Variations
Discada can vary wildly based on local traditions, ingredient availability, and personal preference. While the essential sequence of “what goes first in a discada” remains constant, feel free to explore creative spins.
Traditional Northern-Style
- Meat Mix: Bacon, chorizo, beef, pork, plus onions, peppers, and tomatoes.
- Seasoning: Primarily salt, pepper, and maybe cumin. Some home cooks use a bit of bouillon or beer.
- Spice Level: Moderate, usually from fresh jalapeños or serranos.
The hallmark of a Northern Mexican discada is its emphasis on high-quality meats and the robust flavors that emerge from the layering process.
Tex-Mex Influence
- Inclusion of Hot Dogs or Smoked Sausages: Adds a different texture and a nostalgic flair.
- Cheese Toppings: Some folks sprinkle shredded cheese or queso fresco on top just before serving.
- Bolder Spices: You might find more chili powder, paprika, or even chipotle for a smokier kick.
This variation caters to fans of hearty, spicy flavors, blending Mexican traditions with American barbecue sensibilities.
Plant-Based Options
For a vegetarian or vegan discada:
- Use Oil or Plant-Based Sausages: Start by heating a neutral oil or vegan chorizo to replicate the base layer of flavor.
- Extra Veggies: Think mushrooms, zucchini, eggplant, or bell peppers to bolster heartiness.
- Smoked Spices: Smoked paprika or chipotle in adobo sauce can mimic that bacon-like depth.
By focusing on textures and seasonings, you can capture much of the discada essence without any animal products.
6. Serving Discada in Style
Once the cooking is done, it’s time to transform your discada feast into a memorable experience. Presentation might seem secondary, but it can elevate your meal from everyday fare to a showstopping event.
Family-Style Serving
The most traditional approach is simply placing the entire disc in a safe, stable spot—often still on its stand above the heat so it stays warm—and letting everyone gather around. Guests can use:
- Tortillas: Flour tortillas are favored in Northern Mexico, though corn tortillas work too.
- Spoons or Tongs: To fill tortillas or plates with steaming hot discada.
- Small Bowls: For any salsas, garnishes, or side dishes like beans.
This communal setup fosters conversation, shared laughter, and an interactive dining experience.
Taco Assembly Stations
For a more curated touch:
- Warm Tortillas: Keep them in a cloth warmer or wrapped in foil.
- Toppings: Offer chopped onions, cilantro, various salsas, queso fresco or shredded cheese, guacamole, crema, and lime wedges.
- Side Dishes: Refried beans, Mexican rice, or charro beans pair perfectly.
This buffet-style station encourages guests to customize their tacos, controlling spiciness, cheese levels, or garnishes. It’s also an excellent way to accommodate different dietary preferences, as individuals can pick and choose what goes on their plate.
Presentation Tips
- Colorful Garnishes: A sprinkle of fresh cilantro or colorful peppers can contrast with the browned meats for eye appeal.
- Serving Bowls or Cast-Iron Skillets: If transferring from the disc, these vessels retain heat and look rustic on the table.
- Heat Maintenance: If you’ve got a large crowd, keep the discada warm over low heat, so it doesn’t lose its flavor or texture.
7. Safety and Cleanup Tips
Cooking outdoors on a large disc is fun, but it also comes with responsibilities. Proper handling of raw meat, controlling open flames or high heat, and cleaning the disc thoroughly all ensure a safe and enjoyable event.
Safe Handling of Meats
- Separate Cutting Boards: One board for raw meats, another for veggies to avoid cross-contamination.
- Check Temperatures: Use a digital thermometer for meats, especially if cooking large batches. Ground beef and pork should typically reach 160°F (71°C).
- Timely Refrigeration: Perishable leftovers should be refrigerated within two hours, particularly in hot weather.
Maintaining Heat Control
Since discada often involves high-heat cooking:
- Propane Burners: Have extra propane on hand. Monitor the flame, adjusting as needed to prevent scorching or uneven browning.
- Charcoal or Wood: Keep a spray bottle or water source nearby in case of flare-ups. Stir coals occasionally for even heat.
- Safe Zone: Place the disc on a stable surface, away from children’s play areas or high foot traffic.
Cleaning and Storing the Disc
- Let It Cool Gradually: Rapid temperature swings can warp the metal.
- Scrape Off Debris: A spatula or stiff brush can remove any cooked-on residue.
- Mild Soap: Many people prefer just hot water and a gentle scrub, but a small amount of mild soap is acceptable.
- Dry Thoroughly and Oil: Prevent rust by drying the disc completely and coating it lightly with oil before storage.
A well-cared-for disc can last for years and become a treasured part of your culinary equipment.
8. Frequently Asked Questions (FAQs)
Before we wrap up, let’s address some common questions about discada. These queries often arise when people are new to the dish or are trying to adapt it to their own kitchens.
Q1: Can I Cook a Discada Indoors If I Don’t Have Outdoor Space?
Absolutely. While the classic method involves a plow disc outdoors, you can replicate discada in a large cast-iron skillet or wok on your stovetop. Keep your cooking area well-ventilated, as discada typically cooks at high heat and can produce a lot of smoke.
Q2: What Are My Options If I Can’t Eat Bacon?
If you’re avoiding pork, you can use beef bacon, turkey bacon, or simply start with a bit of oil or lard. Another popular choice is to put chorizo in the disc first so that its seasoned fat coats the surface.
Q3: How Long Does It Typically Take to Prepare a Discada?
A standard discada might take between 45 minutes to an hour, depending on portion size and heat levels. This includes rendering bacon, cooking multiple meats, and allowing vegetables to soften into the mix.
Q4: What If I Want It Less Spicy?
Control your peppers. Choose mild bell peppers or use fewer jalapeños and serranos. You can always serve spicy salsas on the side, letting heat-lovers customize their own portions.
Q5: Can I Make a Vegetarian or Vegan Discada?
Yes! Swap meats for portobello mushrooms, zucchini, eggplant, or plant-based sausages. Start with vegetable oil and add extra smoked spices to replicate that savory quality. The layering concept remains the same—build from a flavor base and add each ingredient in stages.
Q6: Where Can I Learn More About Traditional Discada Cooking?
If you’d like to explore regional recipes and cultural context, visit the Official Chihuahua Tourism Website for occasional articles or guides on Northern Mexican dishes. Their resources often highlight local culinary traditions, variations, and festivals centered around discada.
9. Conclusion
Discada stands out as a celebratory dish that combines culinary ingenuity with cultural bonding. Knowing what goes first in a discada—bacon or another fatty element—is fundamental to mastering this hearty meal. That initial layer of rendered fat paves the way for building robust flavors as you add chorizo, beef, and vegetables in sequence.
Related article:
What Kind of Meat Is Discada? Delectable Secrets 7
Discada Recipe You’ll Love – 15 Steps to Master This Mexican Delight